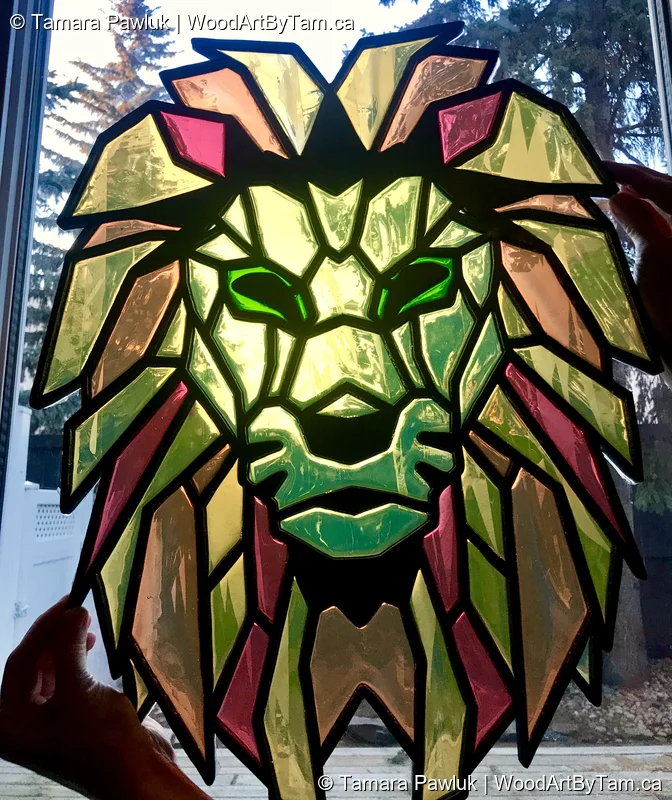

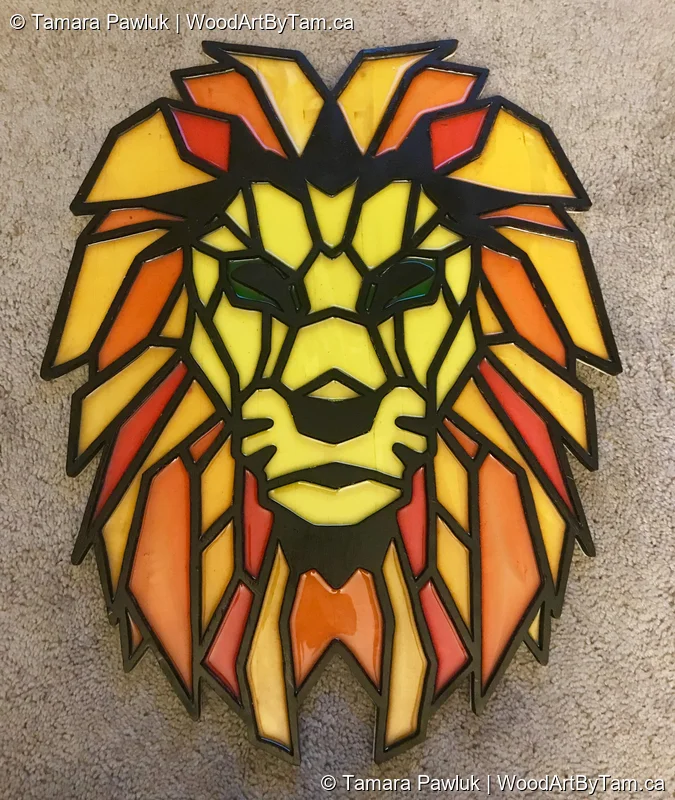
My first resin piece!
Maybe I should have started smaller on my first try with resin but I just dove in head first. When I saw this lion pattern, I immediately knew that this was the sort of pattern that would be perfect for resin incorporation to make a kind of faux stained glass look. I cut the lion from 1/4″ baltic birch and spray painted him black. He was quite big at about 2′ tall. That was the easy part. Now, how to add the resin? I obviously couldn’t just pour it in as it would leak everywhere. So my brilliant idea was to cover the back in a clear packing tape and hope that it was removable later. That worked marvelously in that it contained the resin and the different colours did not leak into each other. But not so great when it came time to remove the tape. First of all, it was difficult to remove without leaving bits behind and once I got off as much as I could, you could see the lines left from the tape through the resin.
It still looked not too bad but because of the tape residue and lines, it didn’t quite cut it as a stained glass look. So I cut a backing piece of wood and painted it white so as to bring out the colours.